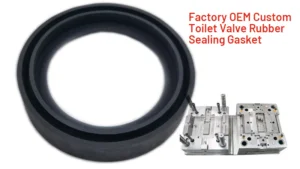
Troubleshooting rubber compression molding is essential for maintaining high product quality and efficient manufacturing processes. Rubber compression molding is a widely used technique that involves shaping rubber materials into desired forms by applying heat and pressure. However, like any manufacturing process, it comes with some common defects. This guide will cover the most common problems in rubber compression molding, offer practical solutions, and provide preventive measures to ensure a smooth and efficient production process.
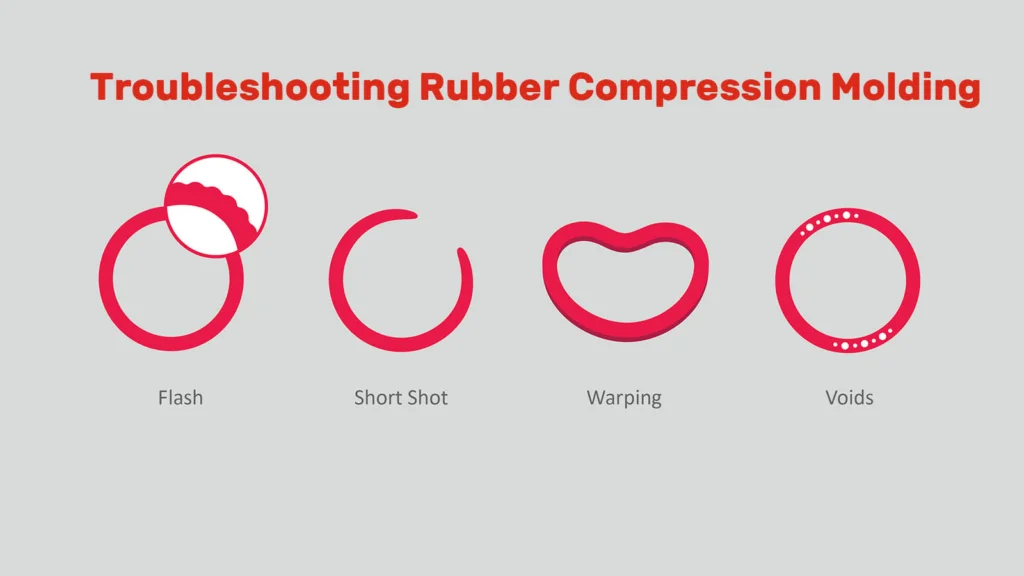
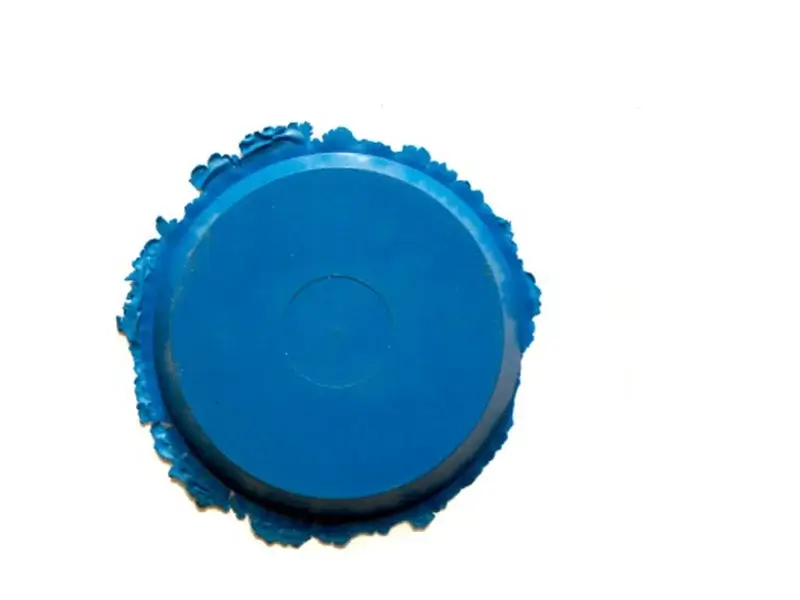
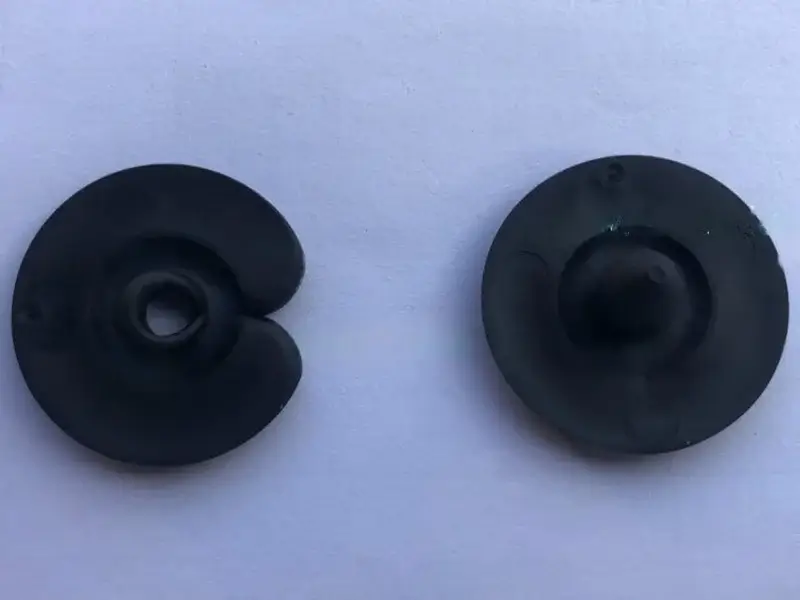
1. Flash or Excess material
Flashing refers to the excess material that appears around the edges of the molded part, creating an unwanted thin layer or ridge.
Causes
Incorrect Mold Design: Poorly designed molds with improper parting lines or mismatched mold halves can lead to excessive flashing.
Improper Material Flow: Inconsistent or uncontrolled material flow during the molding process can cause material to seep out of the mold cavity.
Excess Material: Using too much material in the preform can lead to overflow and flashing when the mold is closed and pressure is applied.
Solutions
Optimize Mold Design: Ensure that the mold design includes precise parting lines and that the mold halves align perfectly. This minimizes gaps where excess material can escape.
Adjust Material Quantity: Accurately measure and control the amount of material used in each molding cycle to prevent overflow. Using just the right amount of material helps avoid excess that can cause flashing.
Ensure Proper Clamping Force: Apply adequate clamping force to keep the mold halves tightly closed during the molding process. This prevents material from leaking out and forming a flash.
2. Air Traps and Bubbles
Air traps and bubbles are air pockets or voids that become entrapped within the molded part, compromising its structural integrity and appearance.
Causes
Inadequate Venting: Insufficient or improperly placed vents in the mold can prevent air from escaping during the molding process, leading to air pockets.
Rapid Material Flow: If the material flows too quickly into the mold, it can trap air within the cavity before it has a chance to escape.
Improper Mold Closure: Gaps or misalignment in the mold closure can create spaces where air can become trapped during the molding process.
Solutions
Improve Venting: Ensure that the mold has adequate and strategically placed vents to allow air to escape. Regularly clean and maintain these vents to prevent blockages.
Adjust Material Flow Rate: Control the flow rate of the material to ensure it fills the mold cavity smoothly and evenly, allowing air to escape more easily. Slowing down the flow rate can help reduce the chances of trapping air.
Ensure Proper Mold Closure: Verify that the mold halves align correctly and close completely without gaps. Proper maintenance and regular inspections can help maintain mold integrity and prevent air traps.

3. Incomplete Filling or Short Shots
Incomplete filling, also known as short shot, occurs when parts of the mold cavity are not completely filled with material, leading to incomplete or defective parts.
Causes
Insufficient Material: Not using enough material in the preform can result in the mold cavity not being fully filled.
Low Mold Temperature: If the mold temperature is too low, the material may not flow properly, preventing the cavity from being completely filled.
Insufficient mold pressure: There is not enough pressure applied to force the material to completely fill the mold.
Poor flow design: The mold design restricts or impedes the flow of material into certain areas of the cavity.
Slow Flow Rate: A slow material flow rate can cause the material to solidify before completely filling the cavity.
Solutions
Increase Material Quantity: Ensure that the correct amount of material is used for each molding cycle. Accurate measurement and preparation of the preform can help avoid short shots.
Optimize Mold Temperature: Maintain the mold at the appropriate temperature to facilitate proper material flow and filling. Adjust the temperature settings based on the specific material being used.
Adjust Flow Rate: Increase the material flow rate to ensure that the mold cavity is filled quickly and evenly before the material starts to cure. Fine-tuning the flow rate can help achieve complete filling.
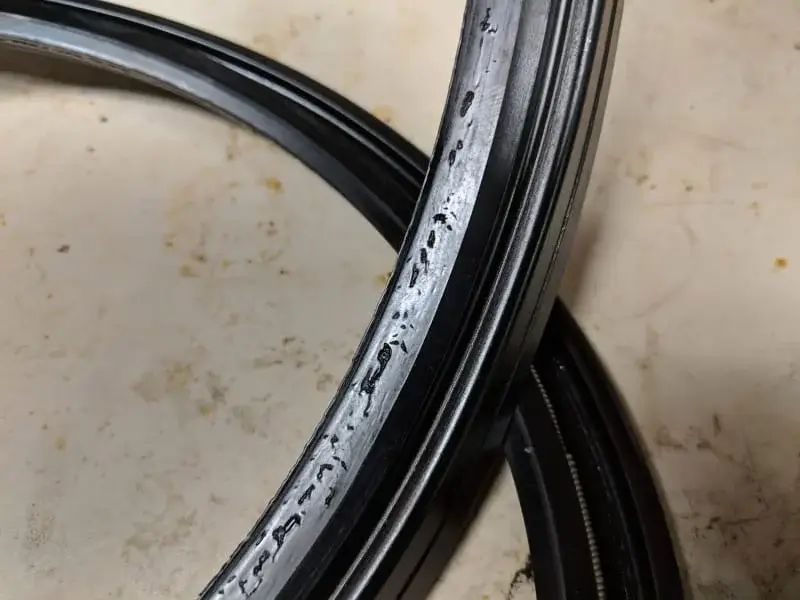
4. Surface Imperfections(Voids, Sink Marks)
Surface defects refer to imperfections on the surface of the molded part, such as blemishes, rough textures, voids, or sink marks. These defects can compromise the aesthetic and functional quality of the part.
Causes
Contaminated Material: Foreign particles or contaminants in the material can lead to surface defects.
Mold Surface Imperfections: Scratches, dents, or residue on the mold surface can transfer to the molded part, causing defects.
Improper Curing Time: Insufficient or excessive curing time can result in incomplete material setting or over-curing, leading to surface imperfections.
Solutions
Use Clean Material: Ensure that the rubber material used is free from contaminants. Store materials properly and inspect them before use to prevent contamination.
Maintain and Clean Mold Surfaces: Regularly inspect and maintain the mold surfaces. Clean the mold thoroughly to remove any residues, and repair any scratches or dents to ensure a smooth molding surface.
Optimize Curing Time: Set the appropriate curing time based on the specific material and part design. Conduct tests to determine the optimal curing time that ensures complete setting without over-curing.
Ensure proper venting: Inadequate venting in the mold can trap air pockets, resulting in voids or sink marks on the part surface. Ensuring proper venting channels allows the trapped air to escape during molding, preventing these defects.
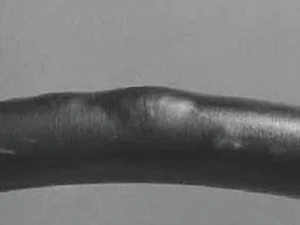
5. Blisters
Blisters are raised areas or bubbles that form on the surface of the molded part, resembling blisters on the skin. These can compromise the part’s aesthetic and structural integrity.
Causes
Inadequate Venting: Poor venting can trap air and gases within the mold, leading to the formation of blisters.
Insufficient Hold Time: Insufficient hold time can prevent trapped air from escaping, resulting in blisters on the surface.
Solutions
Improve Venting: Ensure that the mold has adequate and strategically placed vents to allow air and gases to escape. Regular maintenance and cleaning of vents are crucial to prevent blockages.
Increase Hold Time: Extend the hold time during the molding process to give trapped air and gases enough time to escape before the material fully cures.
6. Warping
Warpage refers to the distortion or bending of the molded part, causing it to deviate from its intended shape. This can affect both the functionality and appearance of the part.
Causes
Non-Uniform Cooling: Uneven cooling of the molded part can cause different areas to contract at different rates, leading to warping.
Inconsistent Material Distribution: Variations in the placement and distribution of the material during the molding process can create areas of uneven density and stress, resulting in warpage.
Residual Stress: Stresses that remain in the molded part after the molding process can cause it to deform over time.
Solutions
Enhance Cooling System: Ensure that the cooling system provides uniform cooling throughout the mold. This can be achieved by optimizing the placement and design of cooling channels to maintain consistent temperatures.
Uniform Material Placement: Place the preform or charge uniformly within the mold cavity to ensure even material distribution and flow. Proper placement helps achieve uniform density and reduces the potential for warpage.
Adjust Molding Parameters: Fine-tune molding parameters such as temperature, pressure, and curing time to reduce residual stress and ensure uniform material flow. Conducting thorough testing and validation can help identify the optimal settings.
7. Sticking in Mold
Description: Sticking in the mold occurs when the molded rubber part adheres to the mold surfaces and does not release properly after curing, which can lead to production delays and damaged parts.
Causes
Mold Release Issues: Insufficient or ineffective application of mold release agents can cause the rubber to adhere to the mold surfaces.
Material Compatibility: Some rubber materials may have higher adhesion tendencies to certain mold materials or surfaces, leading to sticking issues.
Solutions
Improve Mold Release: Ensure that an appropriate mold release agent is applied uniformly and sufficiently to all mold surfaces before each molding cycle. Consider using mold release agents specifically formulated for the type of rubber material being used.
Check Material Compatibility: Verify the compatibility between the rubber material and the mold surfaces. In some cases, modifying the mold surface treatment or using a different mold material may help reduce sticking issues.
8. Shrinkage Issues
Description: Shrinkage in rubber compression molding refers to the reduction in size or volume of the molded part after it has been removed from the mold. This can lead to dimensional inaccuracies and affect the part’s fit and function.
Causes
Low Mold/Preheat Temperatures: Insufficient mold or preheat temperatures can cause the rubber material to cool too quickly, leading to shrinkage as it solidifies.
Poor Venting: Inadequate venting within the mold can trap air or gases, which can affect the curing process and contribute to shrinkage.
Incorrect Cure Time: Improper curing time may not allow the rubber material to reach its optimal state, affecting its dimensional stability after molding.
Solutions
Increase Temperatures: Raise the mold and preheat temperatures to ensure that the rubber material remains at the proper temperature throughout the molding and curing process. This helps reduce premature cooling and shrinkage.
Improve Venting: Enhance mold venting to allow air and gases to escape more effectively during molding. Clear vents prevent trapped air pockets that can affect material flow and shrinkage.
Adjust Cure Time: Fine-tune the curing time based on the specific rubber material being used. Ensure that the material has adequate time to cure fully and achieve its optimal properties, reducing post-mold shrinkage.
Troubleshooting Rubber Compression Molding Conclusion
The key to troubleshooting rubber compression molding is to carefully analyze the specific defect, identify the potential root causes based on the type of defect observed, and then systematically adjust the relevant molding parameters to eliminate the problem. Troubleshooting in rubber compression molding will improve part quality, and enhance the overall efficiency and productivity of their molding operations.